Flex-circuit Soldering & Assembly
Tutorial and
Notes
The availability of inexpensive MEMS devices has made it possible to
integrate arrays of sensors into otherwise ordinary structures.
It is therefore possible to inexpensively create meso-scale smart material structures without
access to a clean room or being an expert in MEMS. Flex-circuits are a
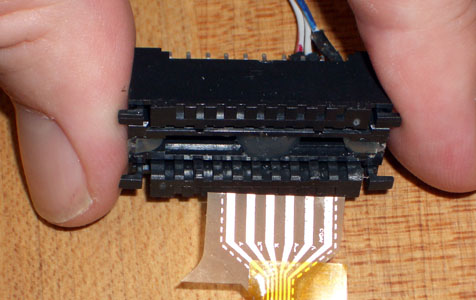
convenient way to create electrical connections to these small surface
mount devices. Not only can they create the required electrical
connections, but they can serve as a substrate for signal conditioning
electronics (ref. shape sensor) or even create a scaffolding for
placement of the sensor arrays.
There are many companies that make flex-circuits (Cirexx, Minco,
Flextronics), however, unlike
rigid PCBs which are an inexpensive
commodity item that can cost less than $100 and take a few days to turn
around prototypes, whereas flexicircuits start at $600 for a couple
flex-boards. Making flex-circuits on your own may not happen flawlessly
on the first try, but if one is persistent and methodical it is a skill
that can be mastered quite rapidly (see flex circuit fabrication
tutorial).
Once you have your flex-circuit and sensors, there is still the issue
of soldering the sensor to the flex-circuit. There are a variety of
methods for soldering these. The primary tools include: (1) a
standard soldering iron, (2) hot plate, (3) standard solder, (4) solder
paste (no clean) (use either eutectic, Sn63Pb37 (e.g. Kester 276,
225 degree C melt) or low temp (200 degree C melt), Sn43Pb43Bi14 (e.g.,
Kester 286LT),
you can get a free sample on the Kester website)
(another option is to use low temp (135 degree C) "tix" solder I've never used it, but
it's used commonly by watch makers, available at Bartlett & Co and Railroad
Watch Tools), (5)
flux pen (no clean), (6) hot air
pencil (see Zephyrtronics),
(7) hot air bath
(see Zephyrtronics),
tweezers, 3rd hand utility tool, tape
As an example for this tutorial, I have fabricated a simple 1-sided
flex-circuit that supports a single 8-pin leadless LLC package
accelerometer (Analog Devices),
associated resistor and capacitors, and a crimp-on flex connector from
FCI. In some ways, this tutorial is more difficult than it needs to be,
because the flex circuit traces are not tinned and my flex board is
made of mylar, meaning that you need to be pretty careful when
soldering not to burn right through the mylar. I'm also using an
accelerometer with a leadless package (with 0.050 inch pitch contacts)
and extremely small resistors and capacitors (0402 package, i.e., 0.040
x 0.020 inch footprint). However, the same instructions generally
apply regardless of the feature sized you're working with. The tutorial
covers a few
options for soldering the device and components, and makes
recommendations for adding stiffeners to reduce stress concentrations
that will naturally occur near solder joints and the connector.
Most labs have a decent soldering iron (including the Stanford BDML),
so this is the primary tool in this tutorial. You'll also need a set of
good tweezers (I prefer ones with a curved tip), some tape, a cutip and
acetone or isopropyl alcohol, a flux pen, and either rosin-core solder
(small diameter, 0.020") or solder paste. You'll also of course need an
accelerometer (I've used an ADXL210E
here, see datasheet)
and 0402 SMT resistors and
capacitors (link to Panasonic components in Digikey). If your flex
circuit has a poly- imide substrate rather than the mylar (polyester)
substrate I used for this example, a hot plate can also
be a handy tool.
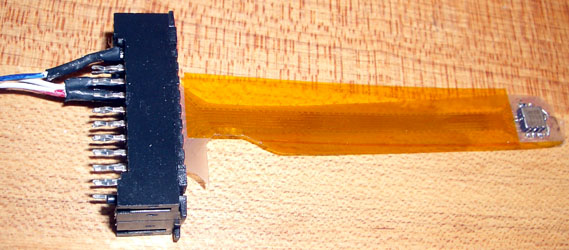
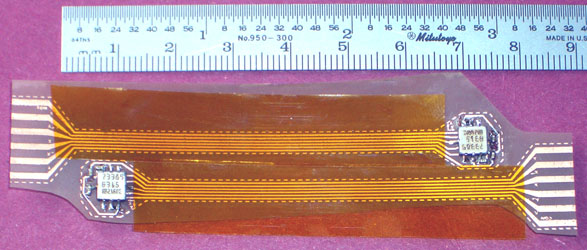
Here's the end product we're trying to make in this tutorial

Here are the basic steps to make this prototype (circuit
layout & pinouts) :
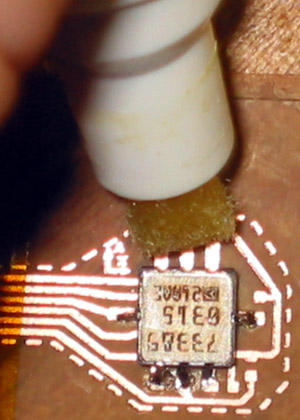
1. Solder the accelerometer in place
(a) Tape the flex circuit down and the accelerometer
to line up with the circuit's solder pads
(b) Tack the accelerometer down at two points
(c) Remove the tape from the accelerometer and
solder the rest of the pads (and perhaps retouching the original tacked
solder joints).
2. Solder the SMT resistors and capacitors in
place
3. Check continuity and sensor outputs
4. Clean off flux/rosin residue
5. Place dielectric tape over traces (front
side)
6. Laminate stiffeners onto the back side
of the circuit
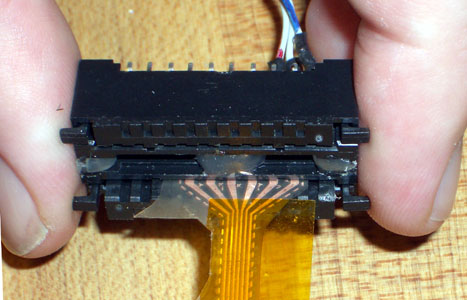
7. Crimp on flex-circuit connector
8. Double check sensor outputs
9. (Optional) Pot solder joints
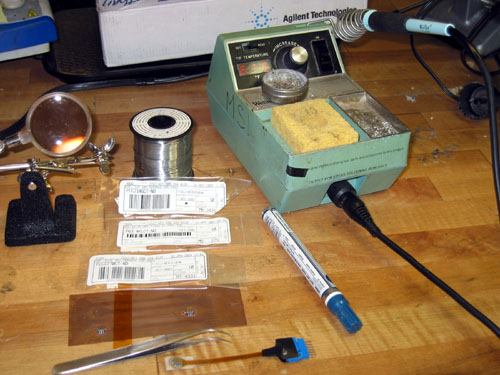
1. Solder the accelerometer in place (Turn
the solder iron on (~640 F if you have a temperature readout on you
soldering iron)
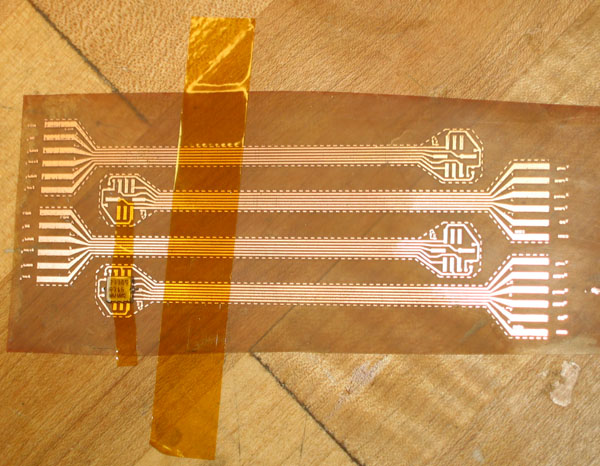
(a) Tape the flex circuit down and the accelerometer
to line up with the circuit's solder pads. Taping the flex circuit down
will keep the substrate from shifting around. I like using Kapton tape
since its adhesive isn't gummy, can be restuck to reorient the circuit
to get better access and won't leave a residue.
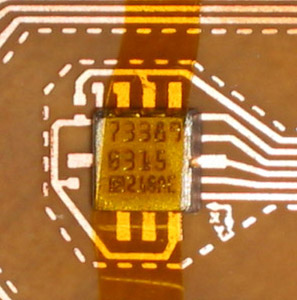
(b) Tack the integrated circuit (accelerometer) down
at two points. Use either conventional soldering techniques for
this or use solder paste for this (see part
(c) or step 2 for techniques..
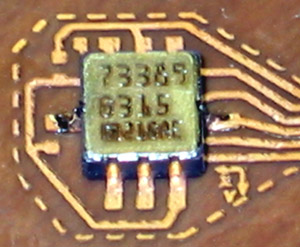
(c) After tacking
into place, remove the tape from the accelerometer and
solder the rest of
the pads (and perhaps retouching the original tacked solder joints).
Soldering these small
contacts can be a bit difficult, but a little practice will make you a
pro. There are two main techniques I've used with some success. Both
use a standard soldering iron and either standard small diameter
rosin-core solder or solder paste (mixture of minute spherical solder
particles, activators, solvent, and a gelling or suspension agent).
Here I'll cover a method that works with standard solder (see notes at the end of this step or step 2) for solder paste method).
Soldering using rosin-core
solder and soldering iron
In this method, a flux pen is your friend. Kester sells "no clean flux"
pens (951
Flux-Pen) that can be purchased at any electronics store for
about $5. The flux cleans and etches the surface oxides, prevents
oxidation of the copper when it is heated, and helps the solder flow
when heated by lowering the surface tension of the molten solder so
that it spreads and penetrates more readily.
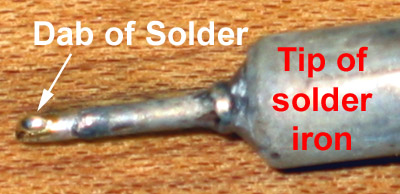
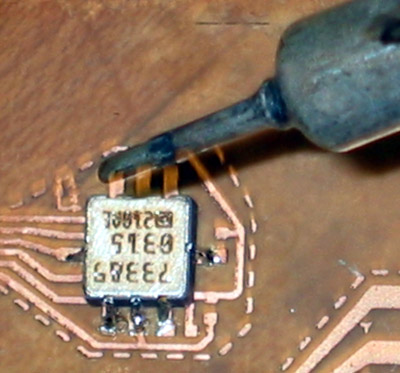
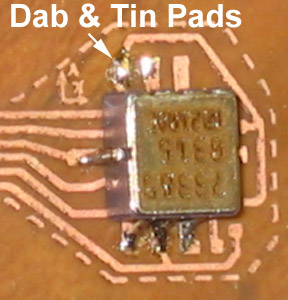
- Start off by dabbing the contacts with flux
- Tin the tip of the solder iron and clean the tip of the solder
iron on a wet sponge
- Put a dot of solder on the tip of the solder iron
- Tin one of the copper solder pads
- Clean the tip of the solder iron again on a wet sponge
- Put another dot of solder on the tip of the soldering iron
- Quickly touch the solder iron to the tinned copper pad and sweep
the tip of the iron up onto the accelerometer lead
In all honesty, the above technique is
pretty tough to master and would receive much criticism from my
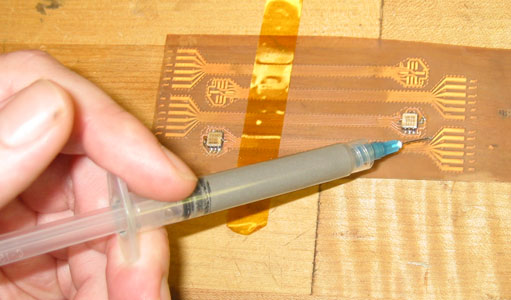
EE colleagues, so I strongly recommend getting some solder paste and a small tipped syringe
with which to dispense it.
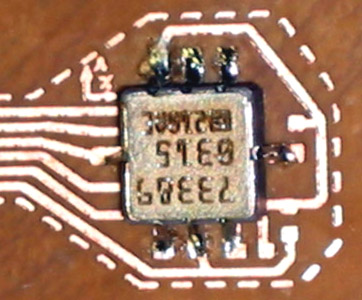
Solder
paste pointers
For pointers on how to solder the accelerometer using solder paste, see
the Analog Devices technical
library techsheet,
or modify the above instructions, by dispensing a small amount of
solder paste onto each solder pad and accelerometer contact. Make
sure to clean the solder iron tip, and quickly bring it into contact
with both the substrate and accelerometer pad. The solder joint will
form almost instantly. If you're not convinced that the solder
joint if formed, dispense a little more solder paste making sure that
the solder paste bridges from the copper solder pad onto the pad on the
side of the accelerometer. Once again dab the joint with the tip
of the solder iron.
2. Solder the SMT resistors and capacitors
in place.
Generally, solder paste is either sold in jars or large syringes, so
buy yourself a small syringe with a xx gauge tip.
- Clean the copper solder pads with the flux pen
- Dispense a small dot of solder paste onto each of the pads for
the capacitor (or alternatively you could tin the pads with standard
solder using the techniques described above)
- Release the required capacitor(s) from the tape real
- Place the capacitor on the copper solder pads (right on top of
the dots of solder paste)
- Tin the tip of the solder iron and clean the tip of the solder
iron on a wet sponge
- Touch the solder pad and capacitor with the tip of the

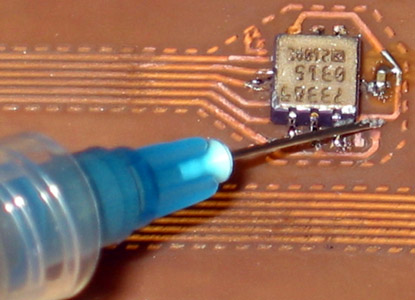
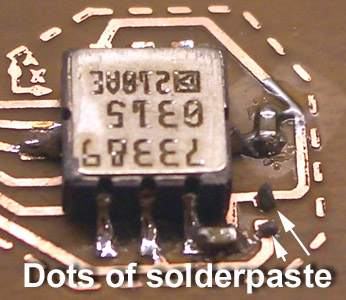
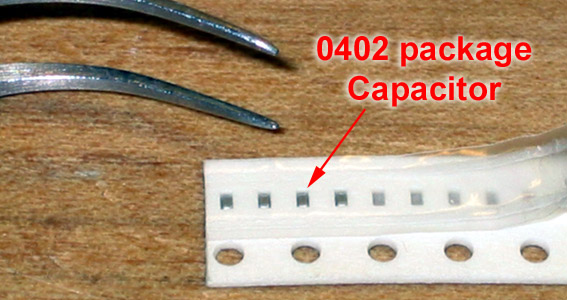
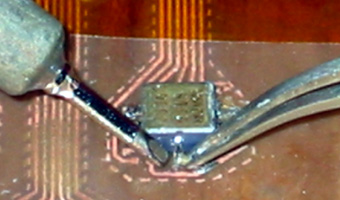
Another look (soldering an SMT resistor)
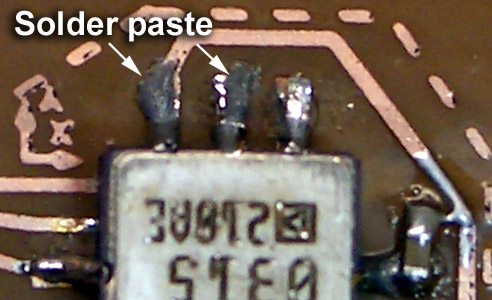
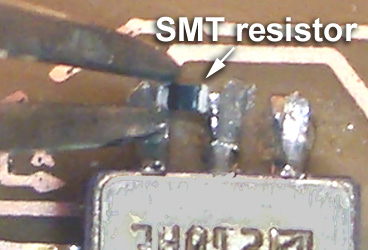
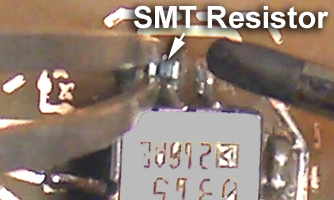
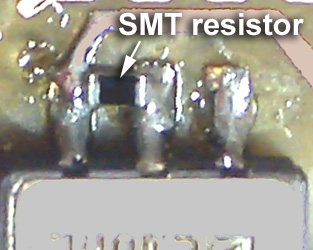
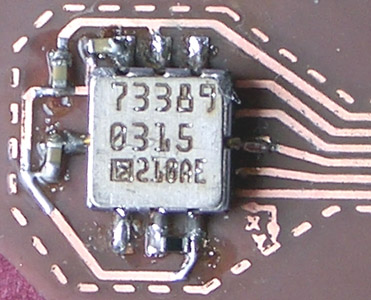
3. Check continuity and sensor outputs
First check your solder joints for continuity with a multimeter.
Check contact from the connector side up to the accelerometer chip and
check for shorts between solder pads. Also check for continuity
between the copper traces an adjacent contacts on the accelerometer.
It's useful to have a ZIF connector to insert the flex board into
before you crimp on a connector. Connectors are available from
xxxxxxx. Here I connect power and ground and use an oscilloscope
to check the analog and the digital duty-cycle outputs of the
accelerometers
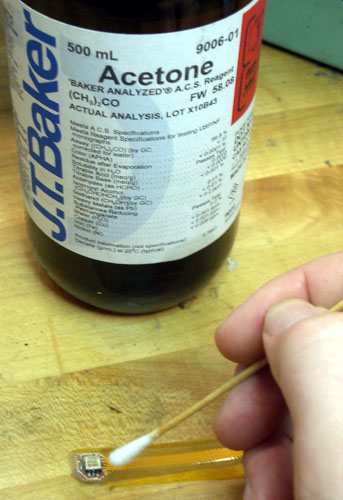
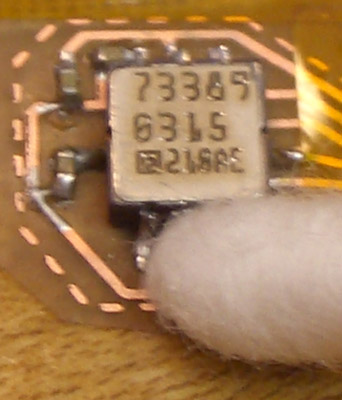
4. Clean off flux/rosin residue (Acetone or
isopropyl alcohol and a
cutip works well)
If you use "no-clean flux" this isn't strictly necessary, but you're
better safe than sorry. Some fluxes can corrode your solder joints and
lead to issues down the road.
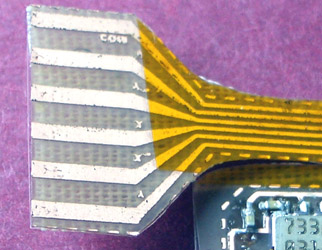
5. Place dielectric tape over traces (front
side). Shown here
with Kapton tape.
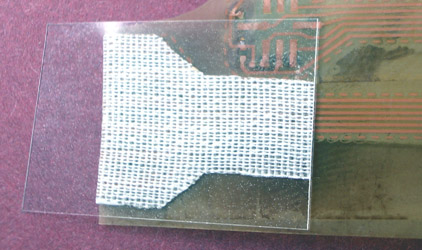
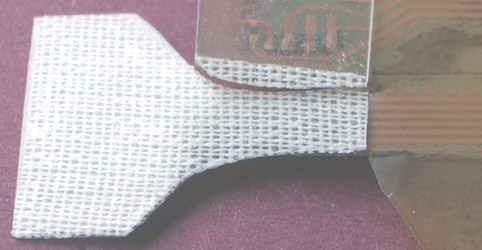
6. Laminate stiffeners onto the back
side of the circuit (I've used
carpet tape or double-back scotch tape and overhead transparency film)
This will reduce stress concentrations at the edge of the connector and
accelerometer. Such stress concentrations, can cause the copper
traces to fatigue and fail.
Back side
Front side
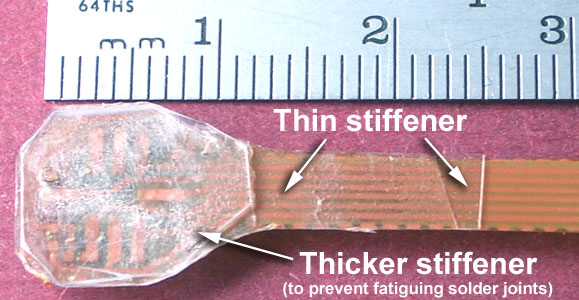
Placing a thicker stiffener near the
accelerometer solder joints will prevent the solder joints from
flexing. Since there is a large stress concentration at each of
the solder joints, it is judicious to use such a stiffener if the
accelerometer will be exposed to active flexing.
7. Crimp on flex-circuit connector
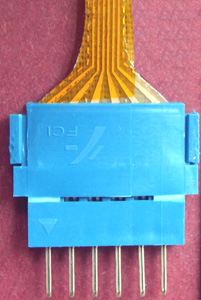
Here I use a connector that requires no special crimping tools and has
a 0.1" pin spacing, so that it can be plugged into a standard
solderless breadboard. This "Clincher"
connector is made by FCI (part # 66226-006,
also available with female sockets, part # 65801-006
).
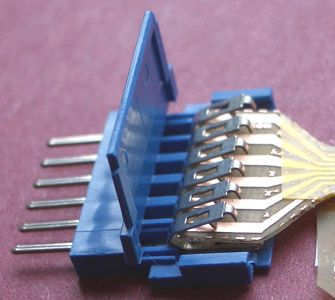
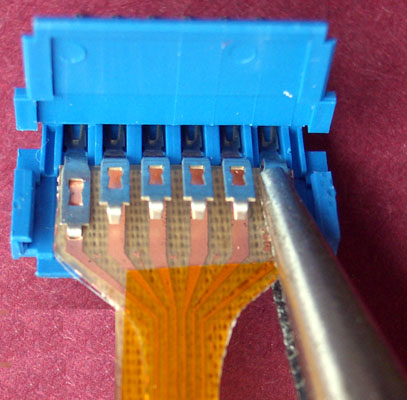
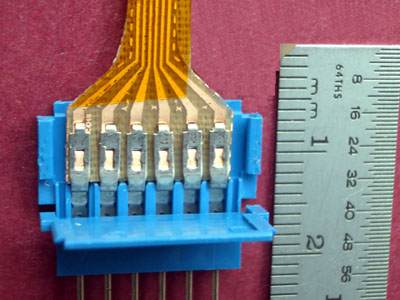
Once you're past the prototyping stage, I'd recommend going with a
smaller connector (something like a Hirose Electronic Co.
Ltd.
FH10A-6S-1SH with 1 mm conductor pitch)
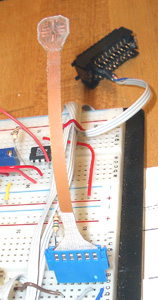
8. Double check sensor outputs (plug it in to
your breadboard and check the outputs one last time. This is
especially important if you are going to do the next step)
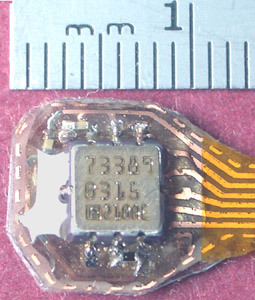
9. (Optional) Pot solder joints (be aware
that this will cause a
mechanical stress concentration at the edge of the potted area.
(dabbing 5-minute epoxy around the edges of the accelerometer works
well. Unfortunately the solder joints that create electrical
connections, also create stress concentrations that are likely to lead
to mechanical fatigue failures. Potting these connections prevents the
solder joints from flexing. However, stiffening this area
underscores the importance of adding moderate stiffening in the
adjacent area as shown in 6 above, otherwise, the copper traces will
fail right at the edge of the potted area.)

Notes:
Put in link to tutorial that Mark put together when he was in Pontedera.
Put in link to PCB tutorial (till I put together a tutorial for making
flex circuits)


